Autumn Perch
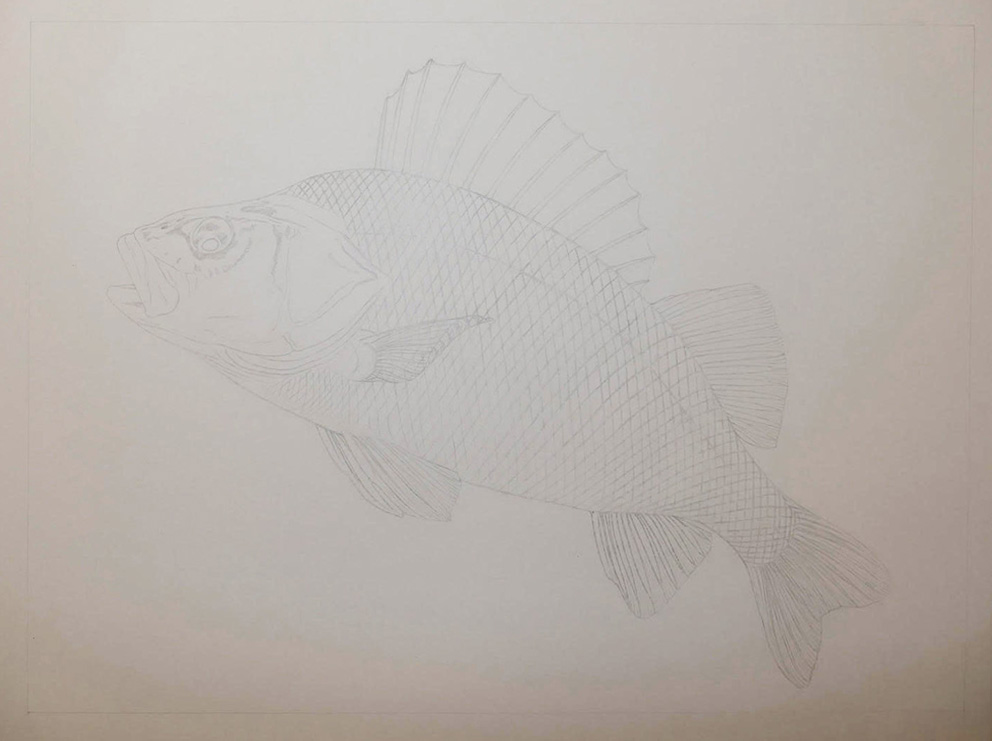
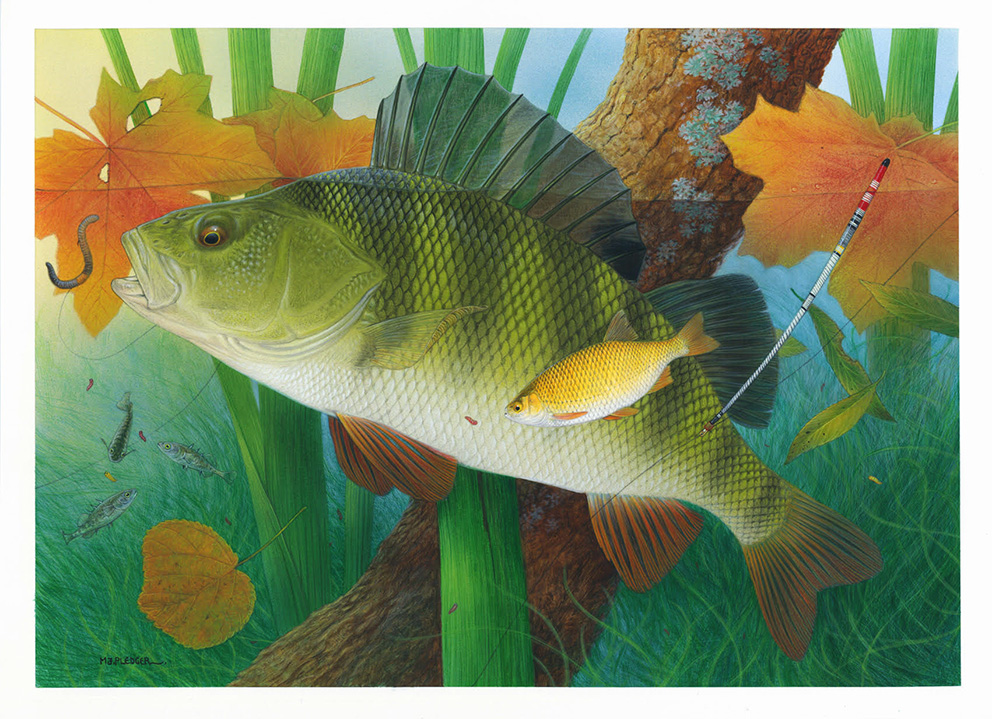
1: A commission from a friend suggesting a perch in a fishing situation, with a goose quill float he’d kindly made me. The size, 38cms x 27cms and landscape format. The image slowly formed in my mind over a couple of days and the perch was drawn out precisely on tracing paper, then again in reverse on the back so I could position it where I wanted. Using a hard H pencil on pure white Excelda Smooth paper I draw it again on the paper very lightly. My board is surrounded by many reference photos I take of perch from when I go fishing. The scales of the perch are marked precisely in position by a series of crossing pencil lines which all intersect along the lateral line.
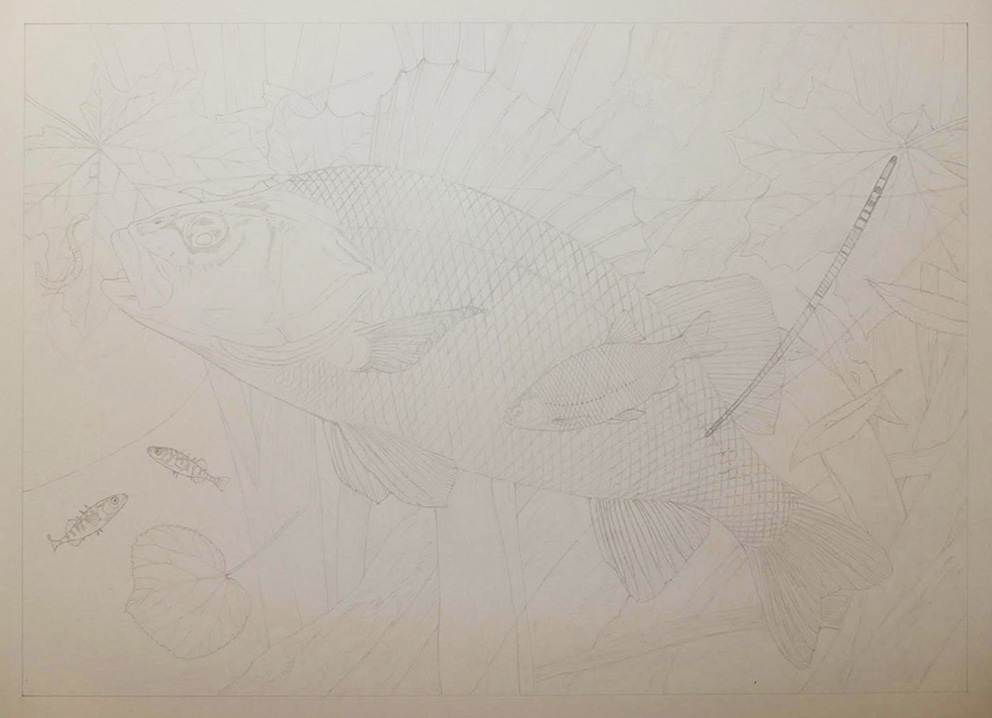
2: I slowly build up the composition adding waterside plants and vegetation. By now I’m surrounded by large glass bowls of reeds and plants that I’ve collected from the river. I carefully position everything exactly where I think it balances out in a pleasing way. In this case, some autumn leaves which have fallen on the water surface, are slowly sinking and swirling around as the perch rises up to take a float fished worm that my friend has cast in. A small rudd and a couple of sticklebacks pick at some maggots which have been thrown in. I add a minnow later. These small details add life and movement to the scene and add to the story of what is going on.
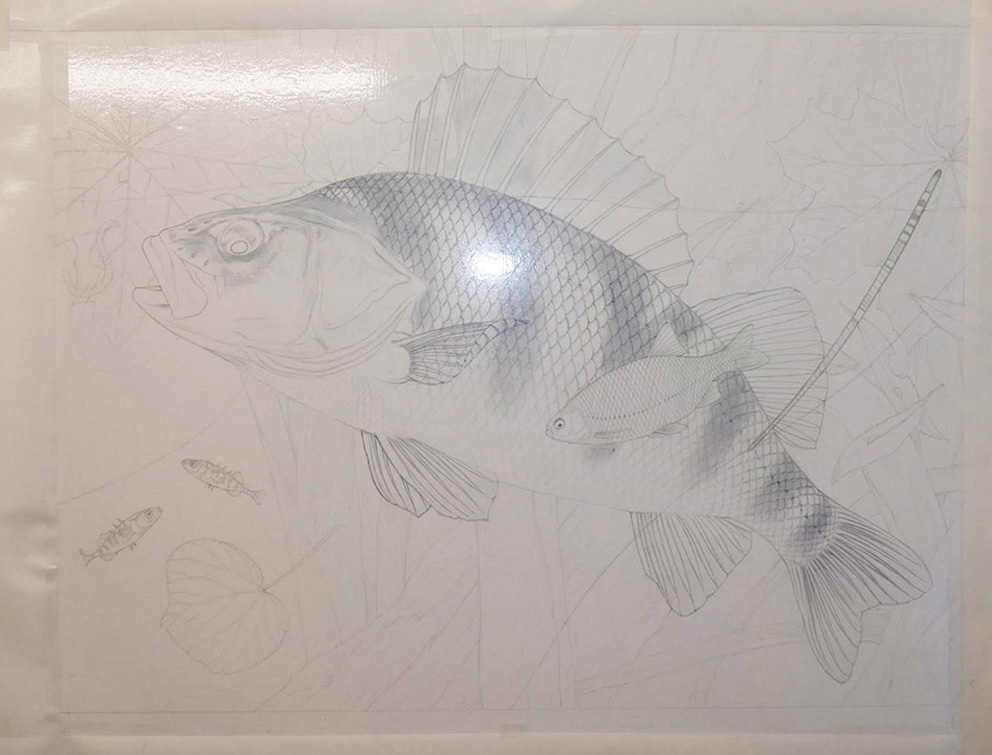
3: Only now do I get out the paintbrush, and using a size 00 sable, I very lightly begin to draw the perch again in washed out black acrylic paint. Slightly darker towards the top of the fish, but a mere hint lower down the body. The acrylic dries immediately, and once I’ve painted the first curls in the scales, I overpaint the body with the dark bars, again in a very washed out black acrylic which appears as a light grey. What looks like a flat wash, is in fact layers and layers of delicate brush strokes using a slightly larger sable which I’ve flattened the point. This is the only time I use acrylic, as it will withstand many layers of watercolour washes as I begin to paint the fish. In this photo, I’ve covered the whole painting with a sheet of low-tack art masking film.
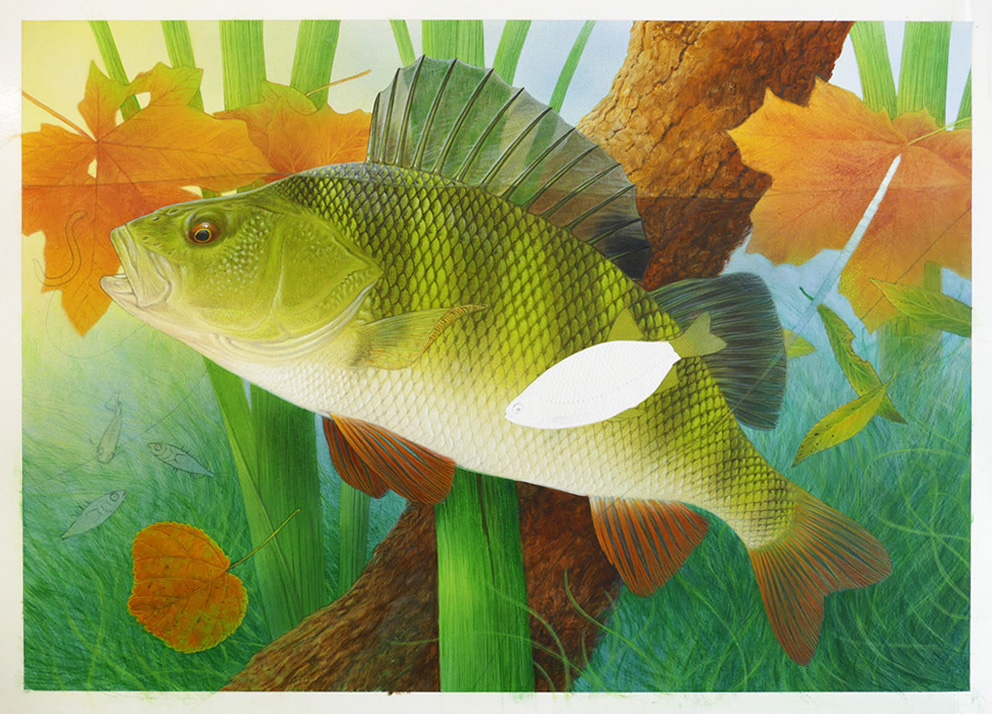
4: With an extremely sharp no. 11 cutting blade, I very lightly cut around the fish being careful not to touch the paper underneath. It is then peeled away, but here I’ve left the rudd in the foreground still covered with the film. Using an airbrush (although not essential), I mix up various blends of colours and loosely spray in the fish. The scales are still visible to an extent, but will need to be all painted again as the deeper washes of green over the fish’s back have covered them up.

5: Now I begin to paint and start working on the fish. Details around the head and all the scales are painted again very lightly. By the time the painting is finished, each scale may have been painted up to 15-20 times, but will give the impression of maybe having been painted once. Even at this early stage I’ve worked on each one at least five times since I started.
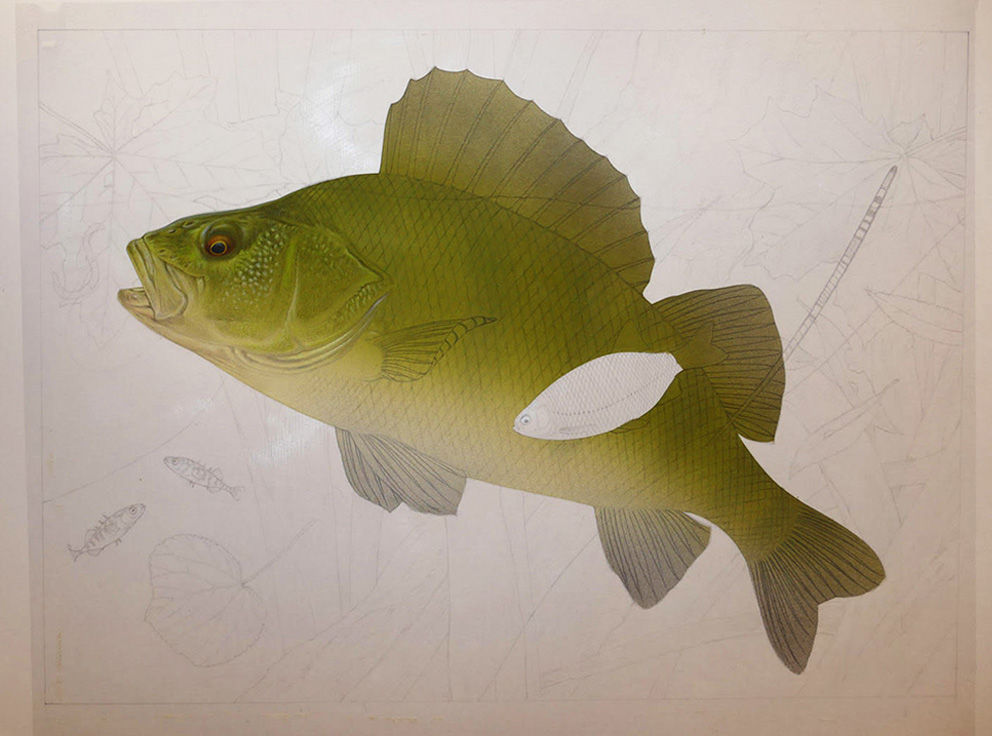
6: The perch is now starting to take shape, but I’ve concentrated mainly on the head and scales. As you can see, the whole fish is very dark against the pure white paper.
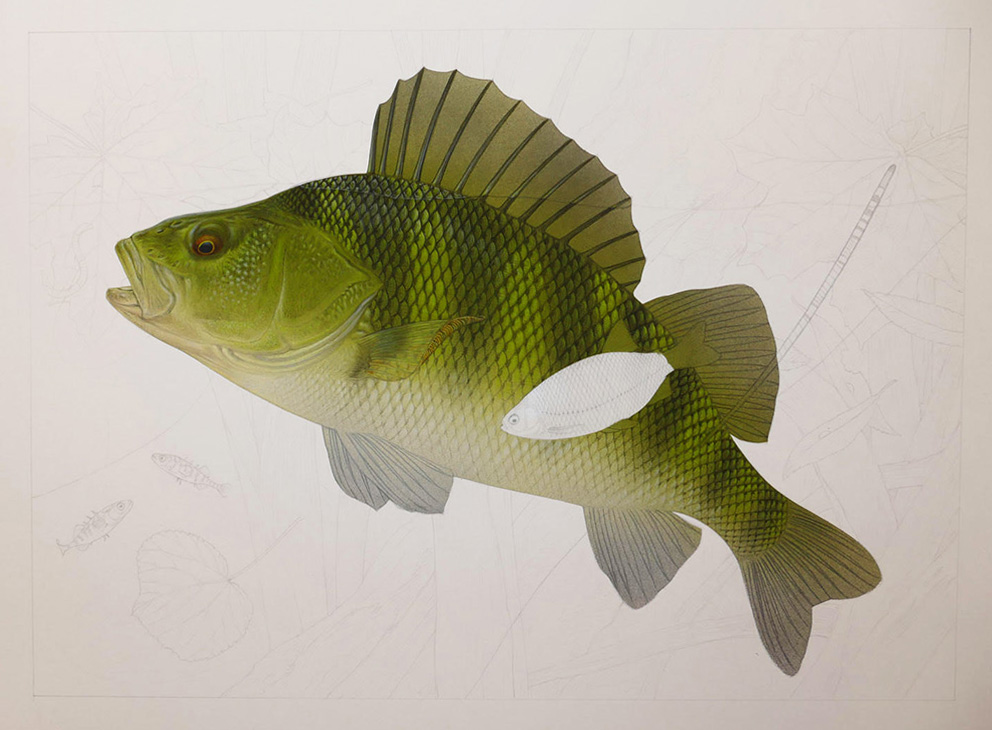
7: I peel off all the masking film and now place a fresh sheet over the whole painting. I cut all around the perch again, but this time leave it covered, while the background is now exposed as it is this area I now wish to paint. Purely to get rid of the white paper, I give the whole painting airbrush washes of blues and greens, and in the top left, light washes of ochres and creams, giving a vague impression of light coming from that area.
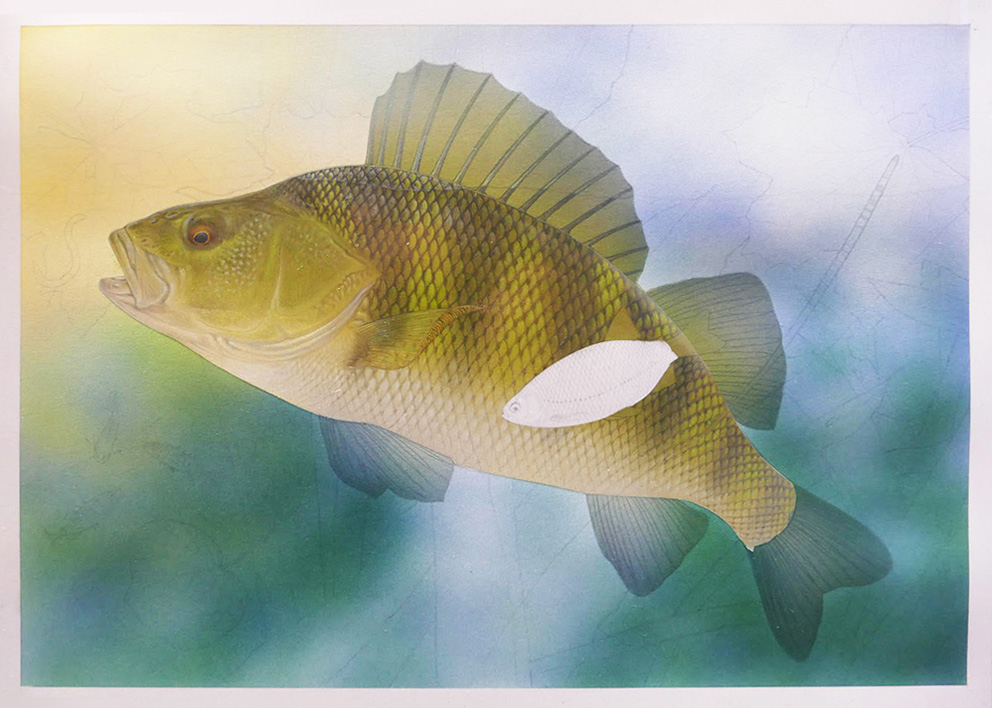
8: More cutting, masking and airbrushing of reeds and leaves, with small amounts of detail being added as I go along, to slowly give form to the composition. While the leaves are exposed, I carefully dab them with a fine bathroom sponge dipped in oranges, reds and browns to give them a slightly stippled effect. I begin to paint in the reeds behind the raised dorsal fin; the first stages of showing it as transparent.

9: The submerged branch is now painted in, changing the effect of the perch which was at one time dark against light, but now, many areas of it are light against dark. Everything is now falling into place, but each stage can take anything from a few hours to a few days to paint.
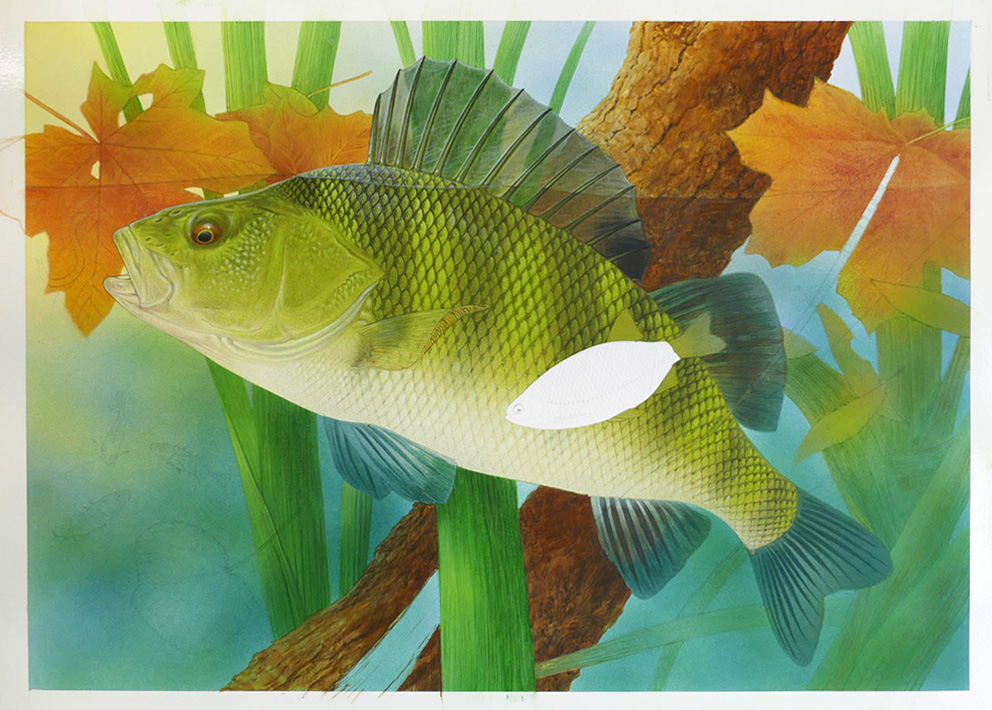
10: I’d slowly become uncomfortable with the area in the bottom right. Although I was happy enough with the general movement in the painting, this area was now beginning to irritate me beyond words, finding it was too static. Trying not not get too upset, I masked off the fish yet again, together with the reeds, submerged leaves and small fish and set about swirling around a large flat ended brush. By masking off different things, the movement of the brush isn’t affected by anything ‘being in the way’ and I’m free to swirl it around all over the place. Eventually when the film is peeled off, there is a natural flow of the swirling weed behind everything else. Bit by bit and after many changes of swirling paint, I completely changed the lower half of the painting, giving the whole scene more movement. Only now do I start adding the oranges and reds to the lower fins and tail of the perch. A slight personal nightmare for me as it is very difficult for me to see reds against greens and browns, and I paint these areas with varying amounts of guesswork and hope more than anything else.
11: Peeling off all the masking film and being glad to see it all go, I finally spent the next several days finishing everything off. The sticklebacks, minnow and rudd, the float, line and worm, and lichens on the the old branch which had fallen in the water. Shadows, light effects and minute additions of lights and darks, swirls in the water and general tightening up of everything in the painting. More work on the scales and generally fidgetting around with everything in the scene, I finally got to the point where I felt it had all come together. Even though it was finished, I smile when I think that what I myself am seeing, is not at all what you are seeing. In this respect I will never know, I can but hope that it all worked out in the end.
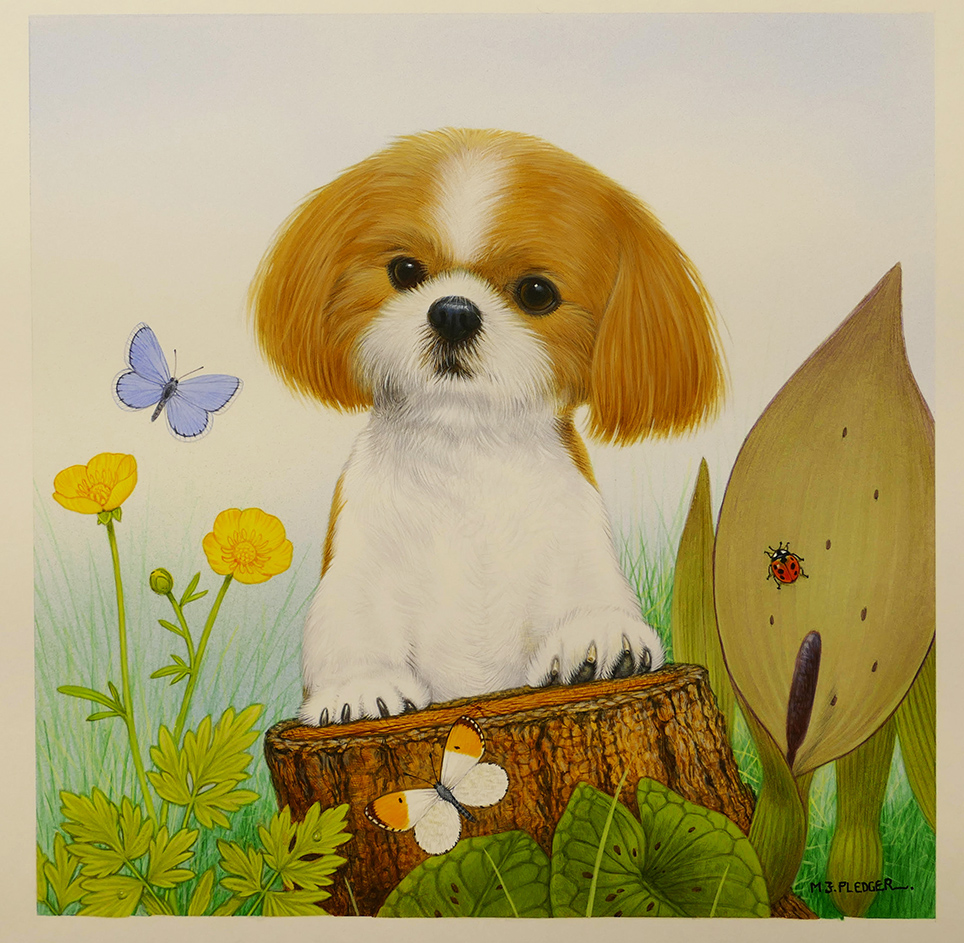
Mouse & Butterfly
1: I like painting my little dog Mouse. Now and then I take a photo of him and it just feels right.The image in my mind just won’t go away, so I just give in and follow along. Working from this particular photo, I wanted to place him standing with his front paws on an old tree stump and watching a butterfly. A size of 21cms x 21cms seemed to balance things nicely. I drew him out on tracing paper, once more on the reverse, then placed him exactly where the image in my mind suggested. I gently rubbed it down, then drew him all over again on my watercolour paper. I use a hard 2H pencil but draw very lightly, hardly touching the surface. I’d previously dampened the paper, then stretched it on the board with parcel tape. Once it dries the paper can take any amount of washes without buckling. For the way I paint, it needs to absolutely flat.
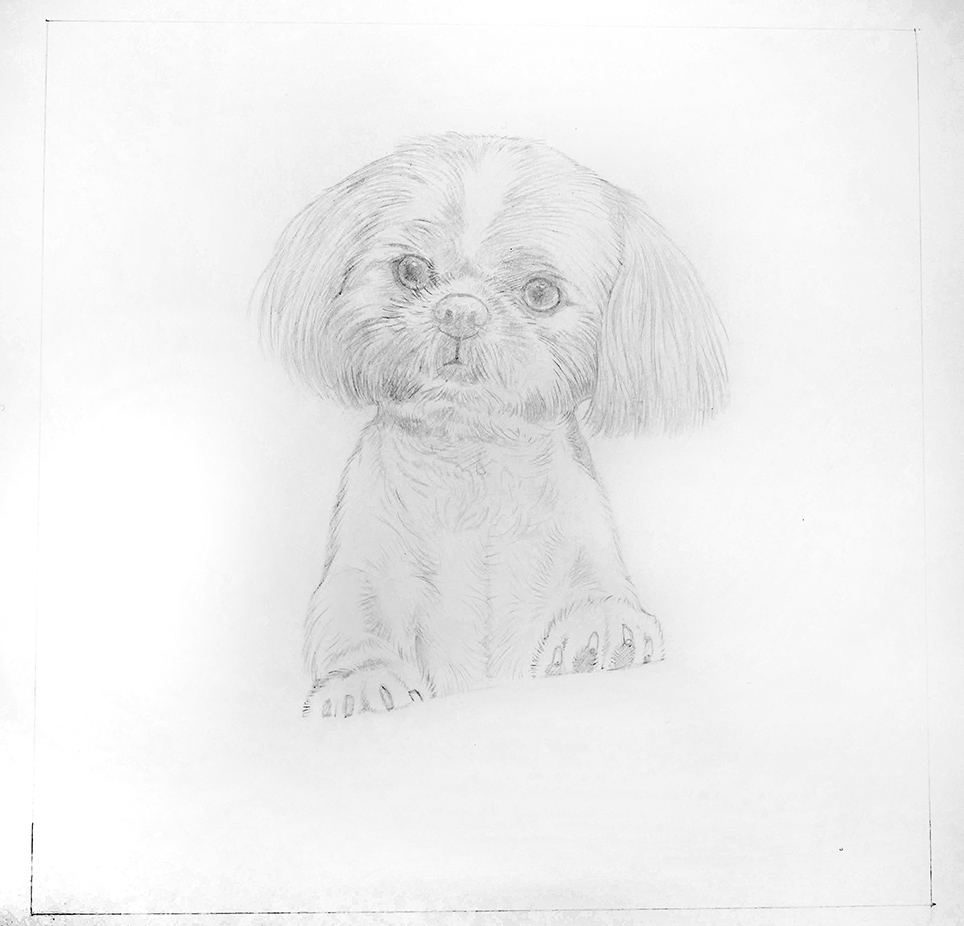
2: I decide on things to add in the composition as I go along. By now I’m surrounded by reference photos of all the plants and vegetation, but more importantly, if everything’s ‘in season’, then I collect all manner of things as I walk around the park with Mouse. In this case, everything was actually growing at the time, so returning home, I was accompanied by no end of buttercups and leaves, bits of wood and cuckoo pint.
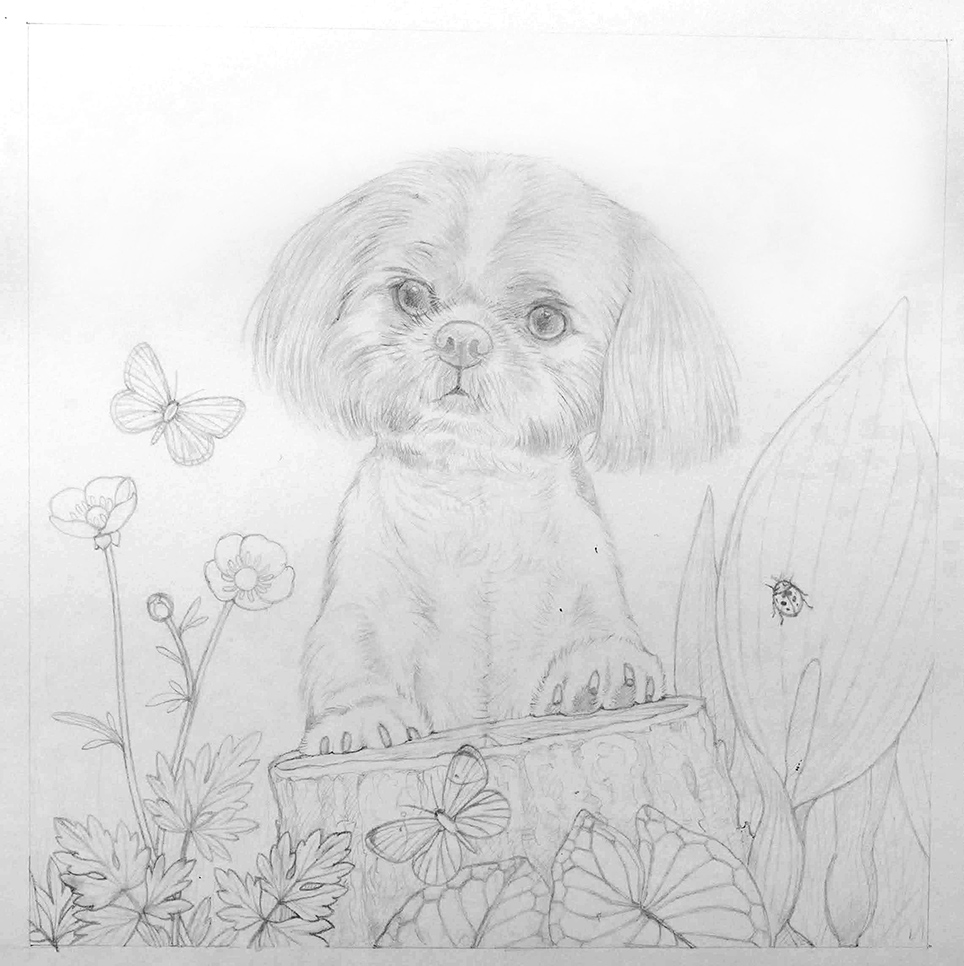
3: With everything now more or less in place, I mask off Mouse with low tack art masking film and very gently airbrush in a very faint light blue/white cloud effect. I could do this without masking anything off, but I wanted Mouse to remain pure white without any areas of blue, however faint, washing into him.
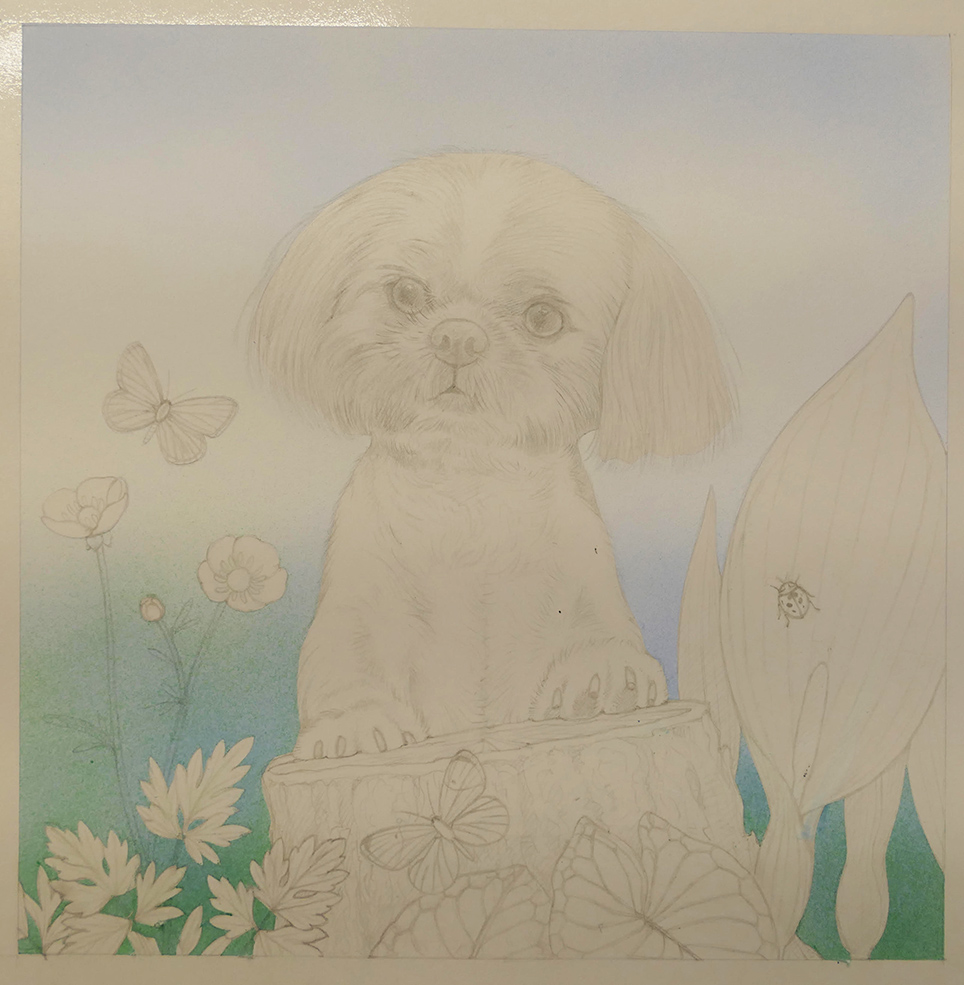
4: With the film still in place, I very lightly brush some grass in the background. Much as I use the pencil, I only very lightly brush a small size 1 or 2 sable, giving the effect of some grass just behind the stump.

5: Deciding to use the airbrush again, I take off all the masking film and place another sheet over the painting. This time I very carefully cut around Mouse with my size 11 cutting blade. Firstly I spray him completely white. Then after a few minutes when it’s dry, I mix up a very light mix of raw umber mixed with a little yellow ochre and spray around his face and ears. What you gain by using an airbrush, it also gives you a little problem you’ll have to deal with. The light smooth effect I wanted was just right, but when you peel away the film, you are left with a hard line. This has to be dealt with, whereas if I hadn’t used the airbrush, I would have just lightly brushed the colour in with a nice soft edge as I went along. No matter, it’s all part of getting the effect you want, then back-tracking to deal with the slight problem you’re left with. I very carefully soften the outline of his head and ears by slightly dampening the same sable brush, then flattening the hairs to a chisel shape. By lightly ‘worrying’ the hard edge, it actually takes off the colour, leaving you with a lovely soft edge. Bit by bit, things start taking shape and I begin to add little details here and there with very light brush strokes of darker brown which I’ve added to the first wash. While I’m doing this, I start to very gently brush in lighter streaks of naples yellow deep mixed with white. I begin to fidget around with areas in his chest and front legs with a very light grey, the first stages of adding details to his fur.

6: By now I’m working the brush all around his body, concentrating especially around his eyes and nose. I start to add more and more detail as I go along, brushing brown into white and white into brown. I’m continually dampening the brush and softening the edges, then adding very fine pure white hairs. Now and then I keep returning to his ears and softening them even more, along with areas around his eyes and nose. I usually leave highlights in the eyes and nose until the end, a kind of ‘finishing off’ touch, but most of the time I can’t wait and add them in as I go along.
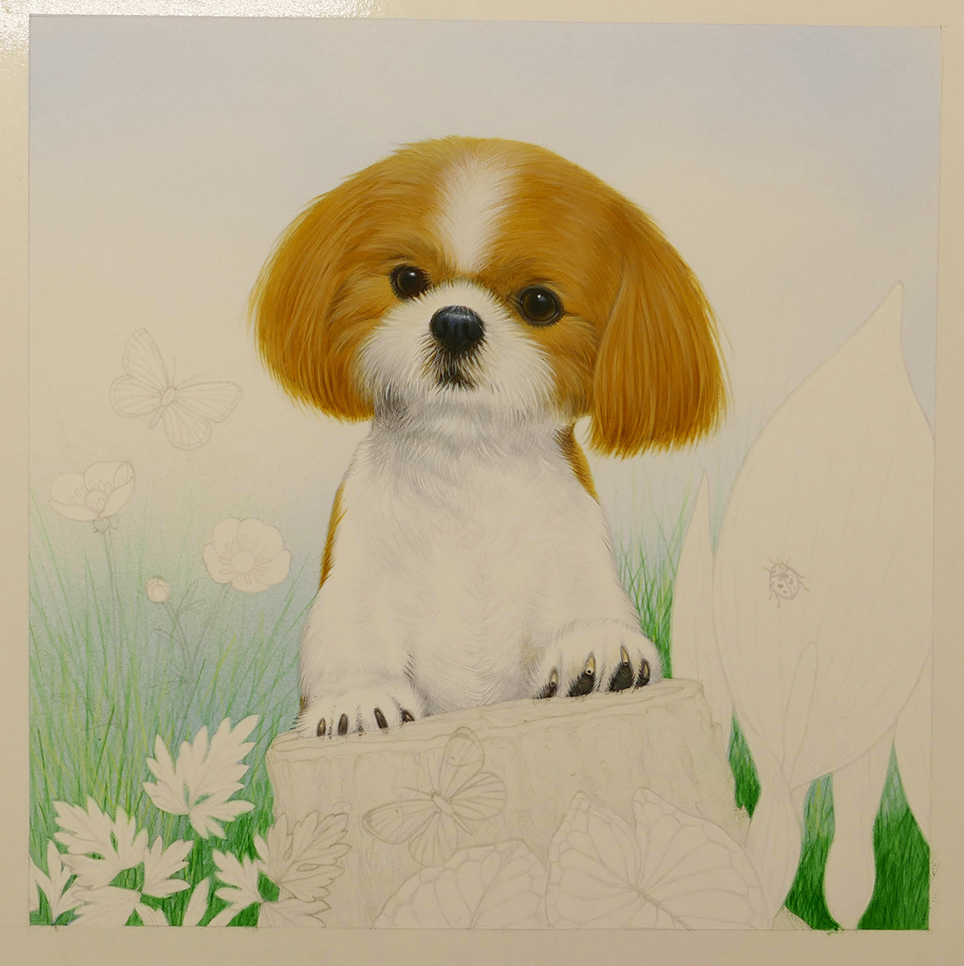
7: Once again I mask everything off and spray in the cuckoo pint and buttercup leaves. Not entirely necessary, but as I’ve taken this path, I’ll carry on with all areas in the painting.
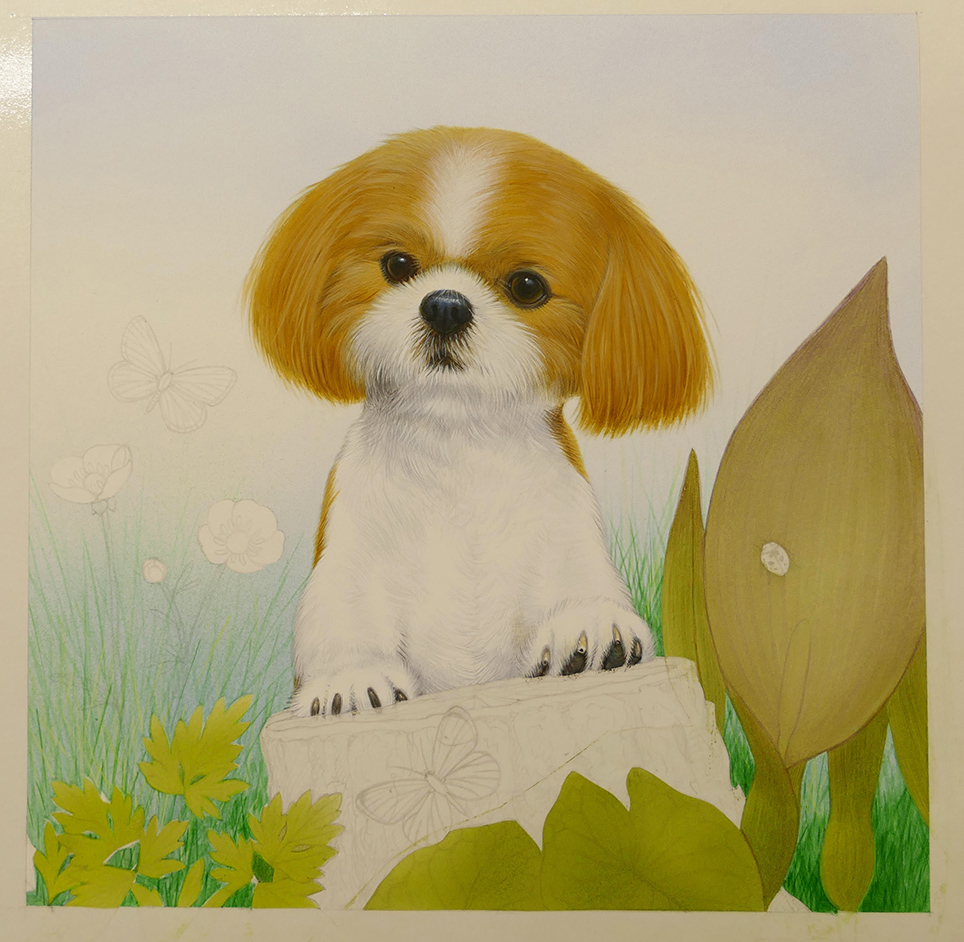
8: I start adding detail to all the plants, then peel off the masking film,happy that I won’t use it any more.
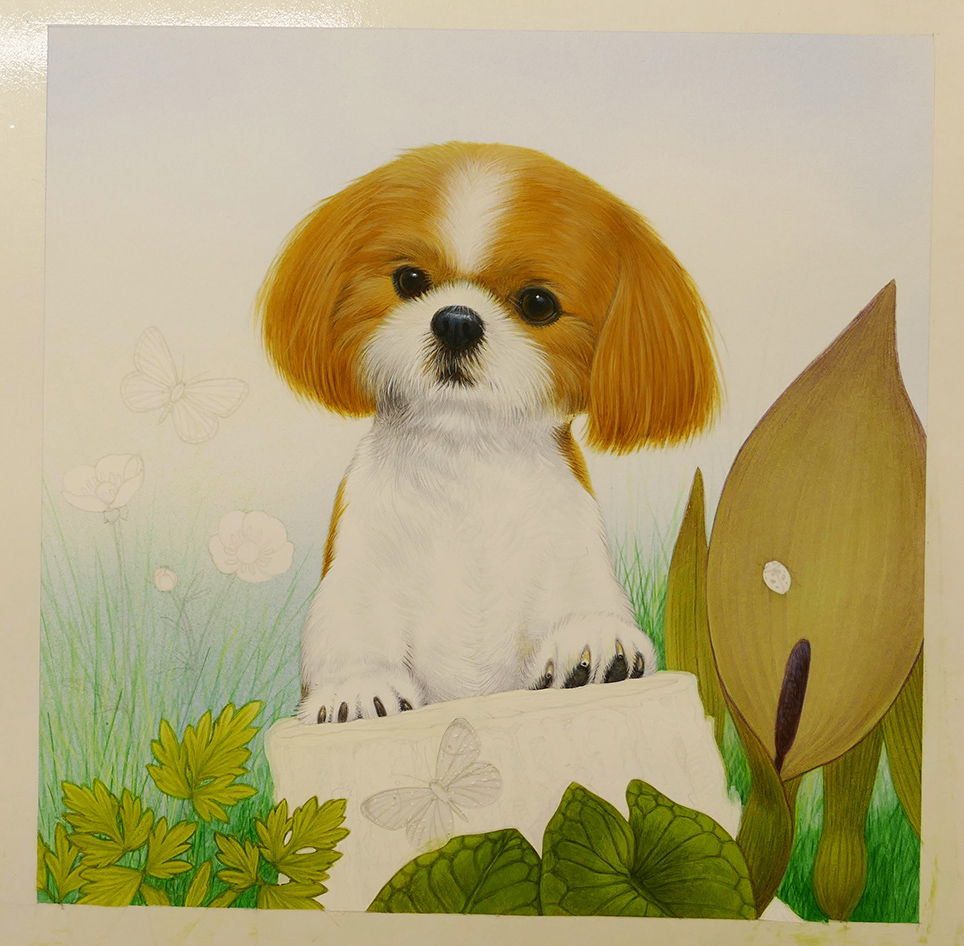
9: That said, I leave it in place over the butterfly while I paint the old wooden tree stump.
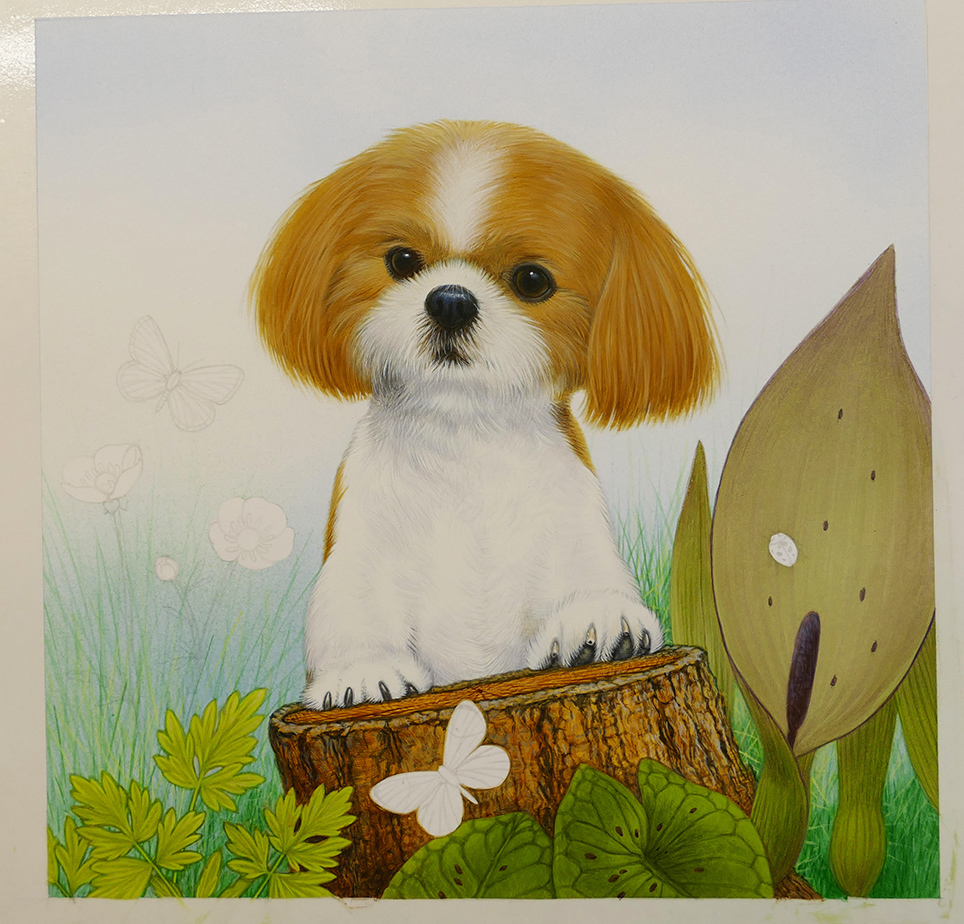
10: It is only now where the whole painting starts coming together, with the painting of all the remaining areas; buttercups, butterflies and ladybird. I continue returning to painting Mouse but by now it’s just the tiniest of details here and there. Somewhere along the line I decide it’s finished and maybe take Mouse around the park again.
